

 English
 中文简体
中文简体You pull the last garlic plant from your garden, and the bulbs feel full and heavy. You know that if you leave them on the counter they will sprout or mold within weeks. The only way to keep them usable through winter is to dry them properly. Drying fresh garlic is actually a curing process. When done right, it turns a high-moisture bulb into a shelf-stable ingredient with concentrated flavor for months. The key is controlling air circulation, humidity, and temperature for 2 to 4 weeks.
Content
Why Drying Garlic Matters
Fresh garlic contains roughly 65 to 70 percent moisture. At that level, the bulb still has active enzymes and enough water for mold spores and sprouting to start. Drying reduces moisture content, lowers water activity, and slows those processes. It also allows the papery outer layers to tighten around the garlic, protecting the cloves from bruising and light exposure. A properly cured garlic bulb loses about 30 percent of its weight, mostly as evaporating water. That weight loss is a sign of success, not a defect. For home growers, the goal is not to remove every drop of water but to change the bulb's internal environment so that it can rest through winter without deterioration.
Getting Your Garlic Ready for Drying
Harvest at the Right Time
Garlic is ready to pull when the bottom leaves have turned yellow and the top leaves are still partially green. If you see the bulbs start to split or the neck is soft, harvest soon. Waiting until all leaves collapse makes the garlic harder to cure and can lead to loose, separated cloves.
Clean Without Water
Brush off excess soil with your hands or a soft brush. Do not wash the bulbs. Water trapped under the skin becomes a breeding ground for mold during curing. If the soil is caked, let it dry for a day and then brush again. Dry dirt is much easier to remove.
Trim Tops and Roots
Use scissors to trim the root beard to about 1/8 inch, and cut the stem as follows: for soft-neck varieties, clip the leaves down to about 1 inch; for hard-neck varieties, leave 6 to 9 inches of stem so you can tie them in bundles.
Choosing a Drying Location
The best spot is dark, dry, and well ventilated. Aim for a temperature range of 20 to 30 degrees Celsius and relative humidity around 60 to 70 percent. A covered porch, garage, or shed works well. Avoid direct sunlight because UV light degrades garlic's pungent compounds and browns the outer color. If you live in a humid climate, add a small fan or dehumidifier. Airflow matters more than heat: moving air pulls moisture away from each bulb and prevents local spots of condensation. Watch out for rain or morning dew if you use an outdoor porch; move the bundles indoors or cover them with a tarp that still allows airflow.
The Curing Process in Detail
Hanging Method
Tie 4 to 6 garlic bulbs together by their stems with twine. Hang the bundles with the bulbs pointing down. This method uses gravity and inherent airflow to dry the garlic around the stem and neck. Keep space between bundles so air can circulate.
Rack or Flat Method
If you prefer not to hang garlic, lay the bulbs in a single layer on a wire rack or a slatted screen. Ensure the bulbs do not touch each other. Turn them over every three days so both sides dry evenly. This method works well for smaller harvests and is easier to monitor.
Duration and Signs of Readiness
Curing takes 2 to 4 weeks depending on humidity, air movement, and bulb size. Hard-neck garlic often requires more time than soft-neck because its thick, dry neck is less prone to shriveling. Check individual bulbs rather than assuming the entire batch is done. After two weeks, check the neck and root. If the neck is firm and brown, and the wrapper is dry and papery, garlic is ready. Gently squeeze a bulb; it should feel tight, not soft. Any visible moisture or linty fuzz is a sign that curing is not finished or ventilation is insufficient.
Comparing Drying Methods
For whole bulbs, the two curing methods above are the safest. Oven and dehydrator methods are better for sliced or minced garlic when you need a faster result, but they cannot replace the curing of a whole bulb. The table below outlines the trade-offs.
| Method | Time | Temperature | Pros | Cons |
|---|---|---|---|---|
| Hanging cure | 2-4 weeks | 20-30°C | Uses gravity, good airflow, traditional | Requires tall space |
| Rack/flat cure | 2-4 weeks | 20-30°C | Easy to inspect, good for small batches | Takes up flat surface |
| Oven drying | 1-2 hours | 40-50°C | Quick, ideal for flakes or powder | Cooks the flavor, uneven drying, not for whole bulbs |
| Food dehydrator | 4-8 hours | 40-50°C | Consistent temps, makes dried slices | Not suitable for whole bulbs, alters texture |
Drying Garlic Slices Quickly
If you only have a few bulbs and want to use garlic as a culinary ingredient rather than store whole bulbs, you can dry slices instead of curing whole garlic. Peel the cloves, slice them to a uniform thickness of about 2 to 3 millimeters, and arrange the slices in a single layer on the dehydrator tray or a lined baking sheet. For a dehydrator, set the temperature to 40 to 50 degrees Celsius and dry for 4 to 8 hours. In an oven, use the lowest setting with the door slightly open to let moisture escape, and turn the slices every 15 minutes. The slices are ready when they snap or crumble dry, with no flexible or leathery spots. This process caramelizes some natural sugars, so the result often tastes sweeter and less pungent than a cured whole garlic bulb.
Quick-dried slices are ideal for seasoning blends, soup bases, and compound butter. They do not store as long as fully cured bulbs because the surface area creates more oxidation, so keep them in an airtight container and use within 3 to 4 months.
Common Mistakes That Ruin Garlic
Here are the biggest pitfalls when drying fresh garlic.
- Washing the bulbs with water before curing.
- Curing in a plastic bag or closed container.
- Exposing garlic to direct sunlight.
- Cutting the roots down to the base before curing, which opens a wound for bacteria.
- Leaving bulbs too close together with no air gap.
- Starting the process with immature garlic that lacks a well-formed skin.
- Using garlic that was harvested too early or too late.
Storing the Dried Garlic
Once cured, trim the stems to about 1 inch and remove the outermost dirty wrapper layers. Store the bulbs in a cool, dark, and dry place at 10 to 15 degrees Celsius with 50 to 60 percent relative humidity. Use a mesh bag, a woven basket, or a cardboard box with holed sides. Do not store garlic in your refrigerator, since cold and high humidity can trigger sprouting. Whole garlic bulbs stored this way can last 6 to 12 months for soft-neck varieties and 3 to 5 months for hard-neck varieties. If you notice a soft bulb during storage, pull it out immediately; a single moist bulb can spread mold to the whole container.
For those who need consistent shelf life and do not want to manage the variability of home curing, pre-dried garlic from a reliable manufacturer removes the guesswork. It is already processed, dried, and packed under controlled conditions.
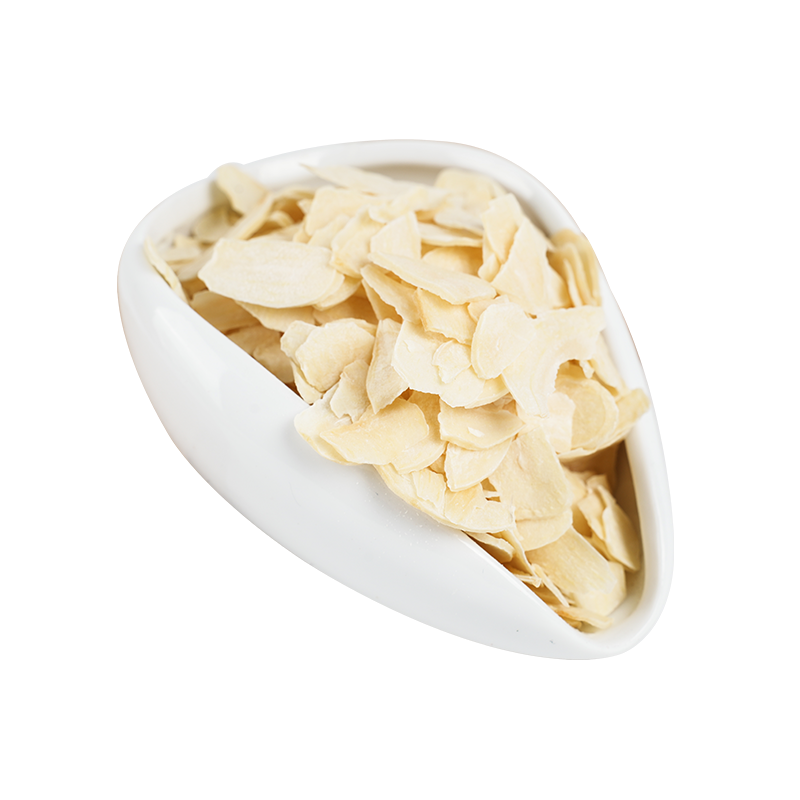 Dehydrated Garlic from a Reliable Manufacturer for Consistent FlavorPre-dried garlic offers controlled moisture below 8 percent, ensuring long shelf life and reproducible taste in large-scale food production. A practical choice for manufacturers needing stable flavor without home-curing variability.View Product →
Commercial Dehydration and Quality Benchmarks
Industrial drying differs from home curing because it uses controlled heat, air velocity, and time to bring moisture down to below 8 percent. That low water activity prevents microbial growth and makes the product suitable for long shipping and storage. Reputable suppliers test each batch for moisture content, color, and allicin-related pungency. For a food manufacturer, buying dried garlic saves labor and ensures a reproducible flavor profile across large production runs.
Garlic powder is another common form. It offers faster flavor release and easier incorporation into sauces, seasonings, and ready meals. If you are sourcing garlic ingredients at volume, comparing whole dehydrated garlic versus garlic powder matters for application. Whole dehydrated garlic rehydrates in soups and stews; garlic powder disperses into dry blends and liquid systems.
Explore our dehydrated garlic powder for industrial use.
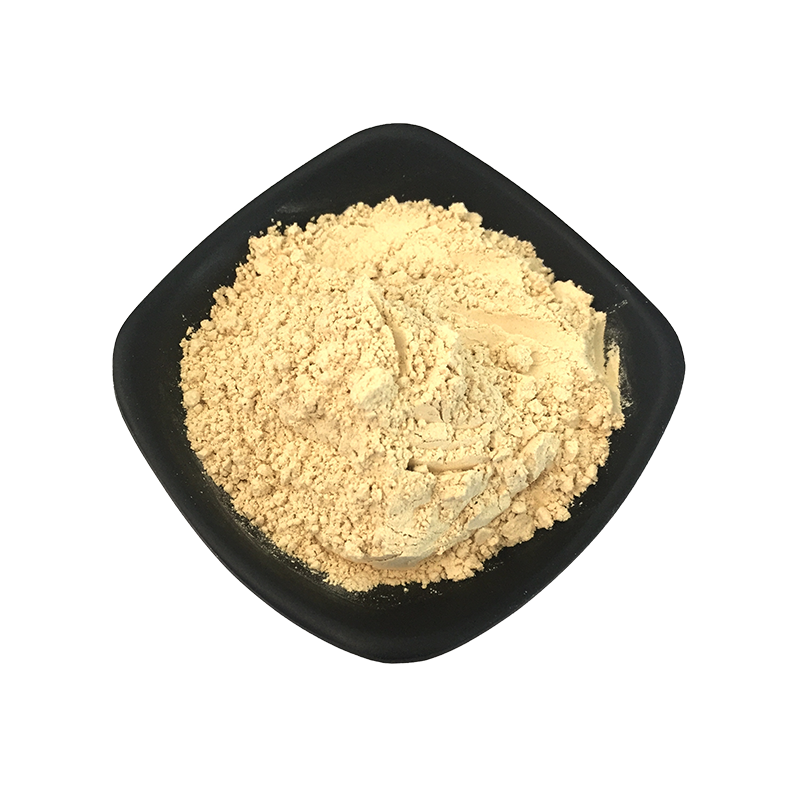 Dehydrated Garlic Powder for Industrial Seasoning ApplicationsFinely ground dried garlic provides concentrated pungency and easy dosing, eliminating peeling and chopping. Its longer shelf life and consistent texture suit soups, sauces, marinades, and dry blends for professional kitchens and food processing.View Product →

 Xinqian Village (Dehydrated Fruit and Vegetable Industrial Park), Duotian Street, Xinghua City, Taizhou City, Jiangsu Province, China
 +86-13852647168
