 English
 中文简体
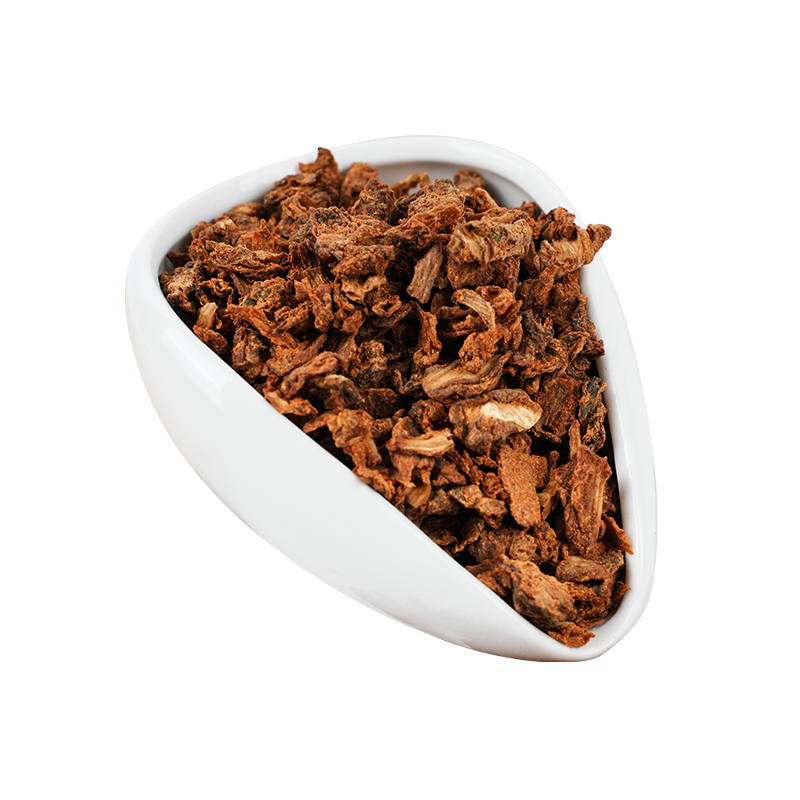
中文简体Dehydrated vegetables are one of the most versatile, nutritious, and practical food ingredients available — usable directly as crunchy snacks, added dry to soups and stews, ground into seasoning powders, or incorporated into snack recipes ranging from veggie chips to trail mix. Whether you are making them at home using a dehydrator or oven, or buying them ready-made, knowing how to use dehydrated vegetables well and how to dehydrate vegetables correctly makes a significant difference in both the quality and nutritional outcome. This article covers dehydrating technique, oven methods, nutritional value, the best vegetables to use, and practical snack recipes — all in one place.
Content
- 1 Dehydrated Vegetables Nutritional Value: What You Actually Get
- 2 Vegetables for Dehydration: Choosing the Right Ones
- 3 How to Dehydrate Vegetables: Step-by-Step
- 4 How to Dehydrate Vegetables in the Oven
- 5 How to Make Chips from Vegetables: Core Technique
- 6 Healthy Dehydrated Snack Recipes
- 7 How to Use Dehydrated Vegetables Beyond Snacking
- 8 Dehydrated Fruits and Vegetables: Combining Them Effectively
- 9 Storage Tips to Protect Nutrition and Crispness
Dehydrated Vegetables Nutritional Value: What You Actually Get
Before diving into recipes and techniques, it helps to understand what dehydration does — and does not do — to the nutrition of vegetables. The core reality is that dehydrating removes water but largely preserves the solid nutritional content, resulting in a much more nutrient-dense product per gram than fresh equivalents.
The nutrients that are fully or largely preserved include:
- All minerals (iron, calcium, potassium, magnesium, zinc) — retained at 95–100%, as minerals cannot be destroyed by heat
- Dietary fiber — fully preserved; dehydrated kale contains approximately 29 g fiber per 100 g dry weight
- Beta-carotene and carotenoids — 75–92% retention in carrots, sweet potato, and bell peppers; lycopene in tomatoes becomes more bioavailable after heat
- Protein — largely intact; dehydrated peas deliver approximately 25 g protein per 100 g
The nutrients with partial reduction include Vitamin C (30–70% loss at standard drying temperatures of 55–70°C) and some B vitamins (20–50% loss for thiamine and folate). However, context matters: the same vitamins are lost at comparable rates when fresh vegetables are boiled. Eating dehydrated vegetables added directly to cooking liquid — without discarding the water — captures more nutrients than eating boiled fresh vegetables drained in a colander.
| Vegetable | Calories (kcal) | Fiber (g) | Iron (mg) | Protein (g) | Beta-Carotene (µg) |
|---|---|---|---|---|---|
| Kale | ~310 | 29 | 12.0 | 26 | 65,000 |
| Spinach | ~290 | 22 | 28.0 | 29 | 45,000 |
| Carrot | ~341 | 15 | 2.5 | 8 | 80,000+ |
| Bell Pepper (red) | ~280 | 19 | 3.5 | 12 | 12,000 |
| Beet | ~325 | 20 | 8.0 | 12 | — |
| Mushroom | ~280 | 18 | 5.5 | 35 | — |
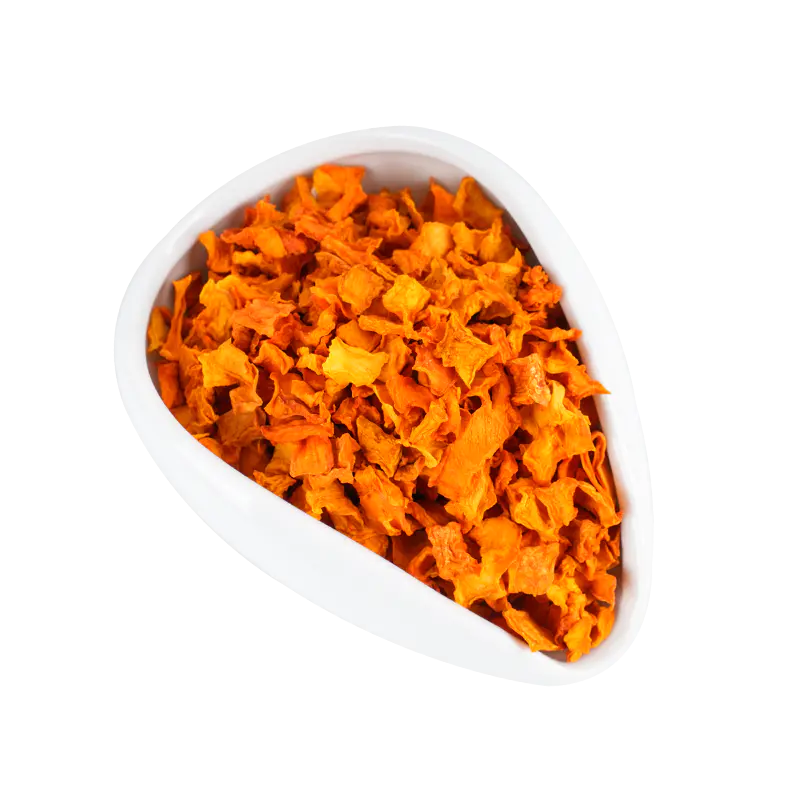
| Sweet Potato | ~354 | 13 | 2.0 | 6 | 55,000 |
In practical serving terms: a 20 g handful of dehydrated kale chips provides approximately 62 kcal, 5.8 g fiber, and 2.4 mg iron — making it one of the most nutrient-efficient snacks per calorie available in any food category.
Vegetables for Dehydration: Choosing the Right Ones
Not every vegetable produces equally good results. The best vegetables for dehydrating share a common profile: moderate-to-low initial moisture, structural integrity that survives the process, and flavor or color that holds up well under heat. The table below gives a practical at-a-glance reference.
| Vegetable | Pre-Treatment | Recommended Cut | Temp (°C) | Time (hrs) | Best Use |
|---|---|---|---|---|---|
| Kale | None / toss in oil | Whole leaves, stem removed | 52–57 | 4–6 | Chips, powder |
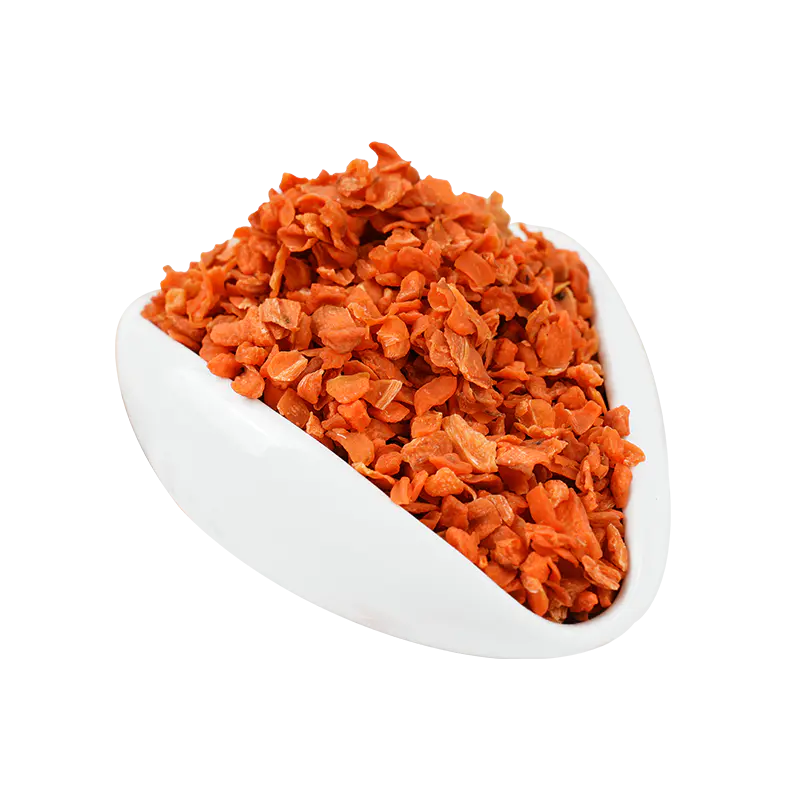
| Carrot | Blanch 3 min (optional) | 3–5 mm slices or 5–10 mm dice | 57–60 | 6–10 | Soups, trail mix, snacks |
| Beet | None | 3–4 mm slices | 57–60 | 6–10 | Chips, powder |
| Bell pepper | None | 5–8 mm strips or rings | 57 | 5–8 | Soups, seasoning, snacks |
| Tomato | None | 6–8 mm slices | 57–63 | 8–12 | Cooking, snacks, powder |
| Mushroom | None | 4–6 mm slices | 46–52 | 4–8 | Soups, powder, snacks |
| Zucchini | None | 2–3 mm slices (thin) | 57 | 5–8 | Chips only |
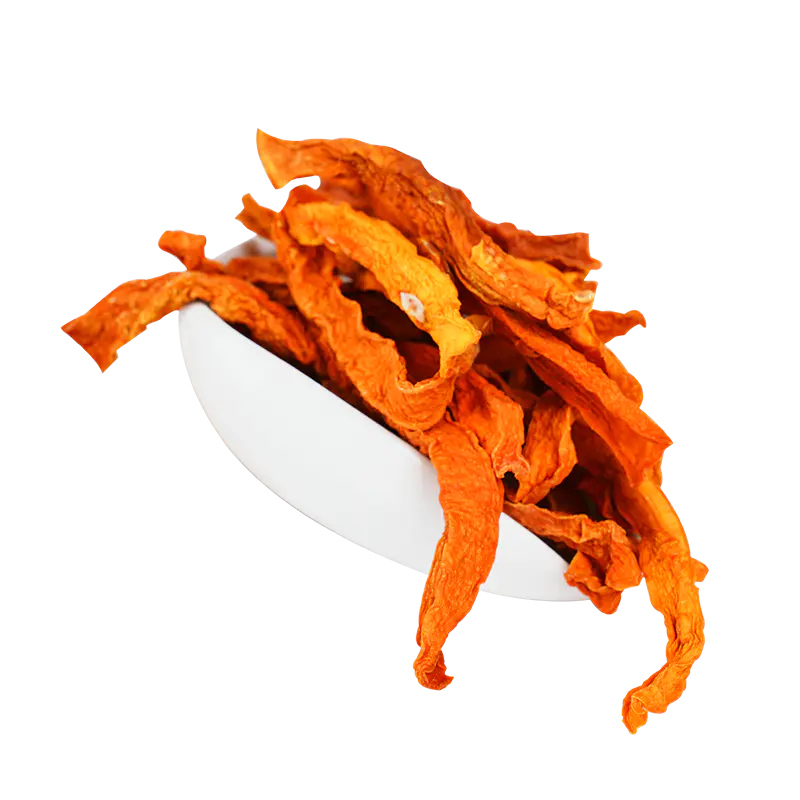
| Sweet potato | Blanch 3–4 min | 5–6 mm slices | 57 | 7–10 | Chips, soups, trail mix |
| Corn | Blanch 2–3 min | Whole kernels | 57 | 6–10 | Trail mix, soups, snacks |
The key principle: the thinner and more uniform the slice, the more even and efficient the drying. A mandoline slicer is the single most useful tool for consistent results, particularly for chip-making applications where uneven thickness results in some pieces burning while others remain undercooked.
How to Dehydrate Vegetables: Step-by-Step
Dehydrating vegetables at home produces shelf-stable results that rival commercial products when done correctly. The process is the same whether you use a food dehydrator or an oven.
Step 1 — Wash and Prep
Wash all vegetables thoroughly under cold water. Peel where appropriate (carrots, beets, sweet potato). Remove stems, seeds, and any damaged sections. The goal is clean, uniform raw material — imperfections in fresh produce become concentrated after dehydration, so removing bad spots before drying is important.
Step 2 — Slice Uniformly
Slice or dice to consistent thickness using a mandoline or sharp knife. 3–5 mm is the target for most snack chips; 5–10 mm dice is suitable for soup vegetables that will be rehydrated in cooking. Thicker cuts take significantly longer to dry and risk uneven results — a 10 mm slice takes approximately twice as long as a 5 mm slice at the same temperature.
Step 3 — Pre-Treat Where Required
Not all vegetables need pre-treatment, but these specific situations benefit from it:
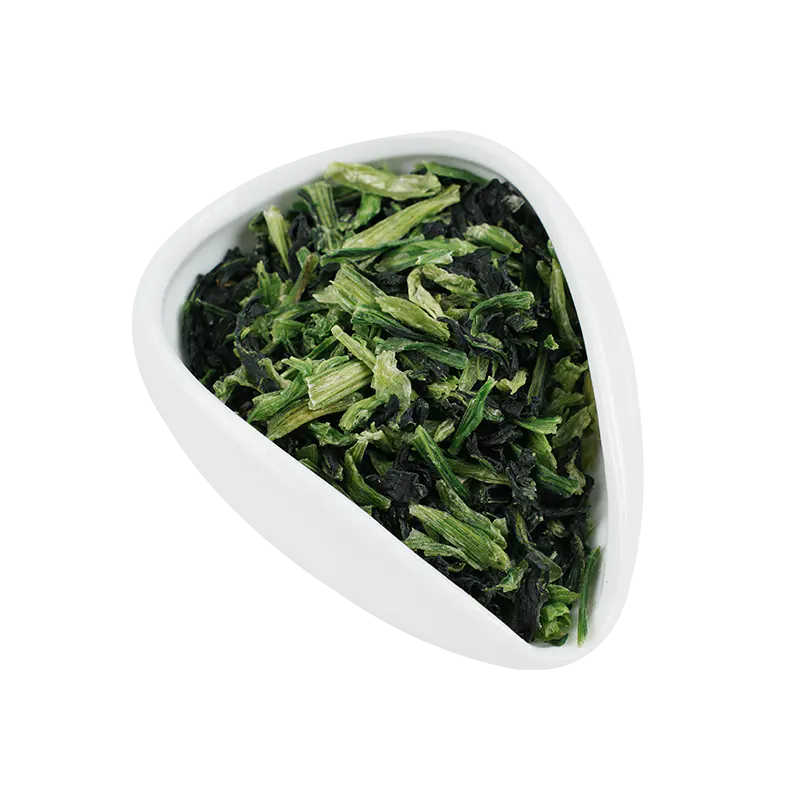
- Blanching (boiling water, 2–4 min + ice bath): recommended for corn, peas, broccoli, cauliflower, and green beans — inactivates enzymes that cause off-flavors and browning in storage
- Ascorbic acid dip (1 tsp ascorbic acid per 1 liter water, 3–5 min soak): prevents browning in pale vegetables like parsnips, cauliflower, and white mushrooms
- Light oil toss (for snack chips): 1–2 teaspoons of olive or avocado oil per 300 g of vegetables improves crispness and helps seasonings adhere — optional but recommended for snacking applications
- No pre-treatment needed: kale, bell peppers, tomatoes, mushrooms, onions, garlic, beets, and most root vegetables
Step 4 — Arrange and Dry
Arrange slices in a single layer with no overlapping — this is critical. Overlapping pieces trap moisture between them, preventing even drying and potentially creating microbial risk in the moist contact zone. Leave at least 5 mm of airspace between pieces on dehydrator trays or oven racks.
Step 5 — Test for Doneness
Vegetables intended for snacking (chips) should be completely crisp and snap cleanly when bent — any flexibility or leathery texture indicates remaining moisture. Vegetables intended for rehydration in cooking can be leathery-dry, but should not feel moist or sticky. Allow pieces to cool completely at room temperature before testing — hot pieces always feel drier than they actually are, leading to under-drying errors.
Step 6 — Condition Before Long-Term Storage
After drying and cooling, place vegetables loosely in a sealed glass jar for 5–7 days before final packaging. Shake the jar daily and watch for condensation or clumping, which indicates residual moisture. This "conditioning" step allows any uneven moisture to redistribute and identifies batches that need additional drying before long-term storage.
How to Dehydrate Vegetables in the Oven
A dedicated food dehydrator produces the most consistent results, but a standard kitchen oven works well for dehydrating vegetables — including making crispy vegetable chips — with a few important adjustments.
Oven Setup for Dehydrating
- Temperature: Set your oven to its lowest possible setting, ideally 55–70°C (130–160°F). Most modern ovens go as low as 50–60°C. If your oven's minimum is higher (some older models minimum at 90°C), prop the oven door open slightly with a wooden spoon to allow steam to escape and bring the effective temperature down.
- Airflow: Use the oven's convection/fan setting if available — circulating air dramatically speeds drying and improves evenness. Without convection, expect drying times to be 30–50% longer than dehydrator times.
- Racks and trays: Line baking sheets with parchment paper or use wire cooling racks placed on top of baking sheets. Wire racks allow airflow under the pieces, mimicking dehydrator trays and reducing the need to flip.
- Rotation: If using solid baking sheets without wire racks, flip pieces halfway through drying to ensure both sides dry evenly.
Oven Timing Reference
At 60°C with convection, expect the following approximate times for chip-thickness slices (3–5 mm):
- Kale chips: 1.5–2.5 hours (thin leaves dry fastest)
- Beet chips (3–4 mm): 3–5 hours
- Carrot chips (3 mm): 4–6 hours
- Zucchini chips (2–3 mm): 2–4 hours
- Sweet potato chips (4–5 mm): 5–8 hours
- Tomatoes (6–8 mm): 6–10 hours
The oven door propping method is the single most useful tip for oven dehydrating. Without it, steam builds up in the oven cavity, raising effective humidity and dramatically extending drying time — often by 2–3× — while producing a less crisp final product. Even opening the door 1–2 cm is sufficient to allow moisture to escape continuously.
One genuine limitation of oven dehydrating versus a dedicated dehydrator: energy cost. A dehydrator running at 300–500W for 8 hours uses 2.4–4.0 kWh. A conventional oven at its lowest setting uses approximately 1,000–1,500W — three to four times more energy for the same result. For occasional chip-making, the oven is perfectly adequate; for regular large-batch dehydrating, a dehydrator pays for itself in energy savings within months.
How to Make Chips from Vegetables: Core Technique
Vegetable chips are the most popular dehydrated vegetable snack format and the easiest entry point for home dehydrating. The fundamental technique applies to any vegetable suitable for chip-making:
- Slice paper-thin and uniformly. For chip applications specifically, target 2–4 mm maximum thickness. Thicker slices produce chewy rounds rather than crispy chips. A mandoline set at 2–3 mm produces the ideal chip thickness for beets, carrots, and zucchini.
- Pat completely dry with paper towels after washing. Surface moisture is the enemy of crispy chips. Any free water on the surface must evaporate before the internal moisture can escape, significantly extending drying time.
- Toss lightly in oil and seasoning. Use 1–2 teaspoons of oil per 250–300 g of vegetables — enough to coat evenly without pooling. Season after oiling: salt, nutritional yeast, garlic powder, paprika, or cumin all work well. For kale specifically, massage the seasoning into the leaves to ensure even coverage.
- Single layer, no overlap. Overlapping pieces create steam traps — the only guaranteed way to produce uneven chips where some are crispy and others remain soft.
- Dehydrate at 52–60°C until fully crisp. Resist the temptation to raise temperature to speed the process — higher temperatures (above 70°C) cause surface hardening (case hardening) before the interior dries, resulting in chips that appear done but become soft within hours as internal moisture redistributes.
- Cool completely before tasting or packaging. Chips always feel slightly softer when warm. Allow 15–20 minutes at room temperature — if they are still not crisp after cooling, return to the dehydrator or oven for 1–2 more hours.
The Best Seasoning Combinations for Vegetable Chips
- Kale chips: 1 tbsp nutritional yeast + ½ tsp garlic powder + ¼ tsp salt — produces a savory, cheese-like flavor with no dairy
- Beet chips: ½ tsp sea salt + a pinch of black pepper — the natural sweetness of beet needs minimal enhancement; salt alone is ideal
- Carrot chips: ½ tsp cumin + ¼ tsp smoked paprika + ¼ tsp salt — warm spices complement carrot's natural sweetness
- Zucchini chips: ½ tsp Italian seasoning + ¼ tsp garlic powder + salt — mild flavor benefits from herbaceous seasoning
- Sweet potato chips: ½ tsp cinnamon + ¼ tsp sea salt — the sweet-salty contrast is one of the most crowd-pleasing combinations
Healthy Dehydrated Snack Recipes
Beyond basic chips, dehydrated vegetables and fruits open up a wide range of snack recipes that are nutritionally dense, genuinely portable, and free from the artificial additives found in most commercial snack products.
Cheesy Kale Chips
Remove stems from one large bunch of kale (approximately 300 g leaves). Whisk together 3 tbsp raw cashews soaked and blended smooth, 2 tbsp nutritional yeast, 1 tsp lemon juice, ½ tsp garlic powder, and ¼ tsp salt. Toss kale leaves in this coating and spread on dehydrator trays. Dehydrate at 52°C for 4–6 hours until completely crisp. Per 20 g serving: approximately 65 kcal, 4.5 g fiber, 3 g protein. Store in an airtight jar for up to 2 weeks.
Spiced Beet and Carrot Trail Mix
Slice 2 medium beets and 3 large carrots to 3 mm on a mandoline. Toss beets lightly in olive oil and sea salt; toss carrots in olive oil, cumin, and smoked paprika. Dehydrate separately at 57–60°C (beets and carrots dry at different rates — beets typically take 1–2 hours longer). When fully crisp, combine with dehydrated corn kernels, dried cranberries, and pumpkin seeds in a 2:2:1:1:1 ratio. The result is a colorful, nutrient-dense trail mix with beta-carotene from carrot, nitrates from beet, and complete protein from pumpkin seeds.
Dehydrated Vegetable Soup Mix
This is one of the most practical uses for home-dehydrated vegetables. Dehydrate diced carrots (5 mm), sliced celery (4 mm), diced onion (5 mm), sliced mushrooms (5 mm), and corn kernels separately (each at their appropriate temperature). Once fully dry, combine in equal proportions and store in a sealed jar. To use: add 30–40 g of the mix to 500 ml of broth or water and simmer for 15 minutes. The vegetables rehydrate completely in the cooking liquid, which retains all the minerals leached during rehydration. A 40 g serving of this mix delivers approximately 120 kcal, 8 g fiber, and significant mineral content from multiple vegetable sources.
Dehydrated Fruit and Vegetable Energy Balls
Grind dehydrated carrot, beet, and apple (all fully dehydrated) to a coarse powder in a food processor. Mix 80 g of this mixed powder with 100 g Medjool dates (pitted), 50 g rolled oats, 30 g almond butter, and 1 tsp cinnamon. Process until a dough forms — add 1–2 tsp water if the mixture is too dry. Roll into 20 g balls and refrigerate for 30 minutes to set. Each ball provides approximately 75–85 kcal with natural fiber from both vegetables and oats, and concentrated iron and beta-carotene from the carrot and beet powders. Refrigerate for up to 7 days or freeze for up to 3 months.
Savory Mushroom and Tomato Powder Seasoning Blend
Dehydrate 200 g sliced mushrooms (46–52°C, 4–6 hours) and 300 g sliced Roma tomatoes (57–63°C, 8–12 hours) until completely brittle. Grind each separately in a spice grinder to a fine powder. Combine mushroom powder and tomato powder in a 1:2 ratio, then add ½ tsp each of garlic powder, onion powder, and a pinch of black pepper. Store in a sealed spice jar. Use 1–2 tsp to season soups, gravies, risottos, and roasted vegetables. This blend delivers concentrated umami, lycopene, and B vitamins in a completely natural, additive-free format.
How to Use Dehydrated Vegetables Beyond Snacking
Many people buy or make dehydrated vegetables and then use them only as snacks, unaware of their broader culinary utility. The following applications expand their practical value significantly:
Direct Addition to Cooking (No Pre-Soaking Needed)
Dehydrated vegetables can be added directly to soups, stews, chilis, curries, and casseroles without any pre-soaking. They rehydrate fully during cooking — typically within 10–20 minutes of simmering in liquid. This method also ensures all the nutrients released during rehydration stay in the dish rather than being discarded with soaking water.
Vegetable Powder as a Nutritional Booster
Dehydrated vegetables ground into powder (using a blender or spice grinder) can be added invisibly to many dishes. Spinach powder or kale powder stirred into pasta dough at 5–8% substitution for flour adds iron, calcium, and beta-carotene without altering flavor perceptibly. Carrot or beet powder adds natural color to baked goods. Mushroom powder adds umami depth to any savory sauce, soup, or gravy with as little as 1 teaspoon per serving.
Instant Meal Kits and Camping Food
Pre-mixed dehydrated vegetable blends are the foundation of homemade instant meal kits. A Ziploc bag containing dehydrated mixed vegetables, instant rice or noodles, and a seasoning packet (made from dehydrated mushroom, onion, and tomato powder plus spices) requires only boiling water and 10–15 minutes of standing time to produce a full meal. A 100 g portion of such a mix weighs under 110 g in the pack but reconstitutes to approximately 500–600 g of food — a weight reduction that makes dehydrated vegetable meal kits essential for backpacking and emergency preparedness.
Smoothie and Protein Shake Addition
Powdered dehydrated kale, spinach, beet, or carrot blends seamlessly into fruit-based smoothies. One tablespoon (approximately 7–10 g) of dehydrated spinach powder added to a mango-banana smoothie contributes approximately 2 mg iron and 4,500 µg beta-carotene while being fully masked by the fruit flavor. This is a practical strategy for consistently increasing vegetable intake for people who dislike eating cooked or raw vegetables directly.
Dehydrated Fruits and Vegetables: Combining Them Effectively
Dehydrated fruits and dehydrated vegetables are natural partners in snack formulations, providing complementary flavor profiles — fruit brings sweetness and acidity; vegetables bring savory depth, color, and fiber. The most effective combinations balance these characteristics.
- Classic trail mix: Dehydrated carrot chips + dehydrated corn + dried cranberries + dried mango pieces + pumpkin seeds — balances beta-carotene from vegetables with Vitamin C from dried mango and cranberries
- Sweet and savory snack mix: Beet chips + dried apple rings + roasted sunflower seeds + a pinch of cinnamon — the earthiness of beet contrasts pleasantly with apple sweetness
- Tropical immunity mix: Dehydrated bell pepper strips + dried pineapple chunks + dried kiwi slices + coconut flakes — bell pepper provides the highest Vitamin C of any dehydrated vegetable; pineapple and kiwi amplify this with additional Vitamin C and bromelain
- Savory herb and fruit mix: Sun-dried tomato pieces + dried figs + dehydrated mushroom slices + rosemary-seasoned kale chips — a sophisticated combination that works well as an accompaniment to cheese boards or wine
One practical note on combining dehydrated fruits and vegetables in storage: fruits typically have higher residual sugar content and slightly higher water activity than vegetables. Mixing them in sealed storage jars over extended periods allows moisture to migrate from fruit to vegetables, softening the vegetables. For mixes intended for long-term storage (weeks to months), package fruits and vegetables separately and combine just before consumption.
Storage Tips to Protect Nutrition and Crispness
The work put into dehydrating correctly is only preserved if storage conditions are appropriate. Three factors determine how long dehydrated vegetable snacks and cooking ingredients retain their quality:
- Moisture exclusion: The single most critical factor. Store in airtight glass jars, sealed Mylar bags, or vacuum-sealed containers. Even a momentarily open container in a humid kitchen allows moisture absorption that softens chips within hours. Adding a small food-grade silica gel packet to storage containers is an inexpensive way to absorb any residual humidity.
- Light protection: UV light degrades beta-carotene, chlorophyll, and Vitamin C. Store in opaque containers, or keep glass jars in a dark pantry or cabinet away from direct sunlight. Color fading in orange or green vegetables is the visible indicator that photo-oxidation has occurred.
- Temperature: Cool storage extends shelf life exponentially. Dehydrated vegetable chips stored at 20°C in a dark airtight container last 2–4 weeks at peak crispness and 2–3 months before significant flavor degradation. The same product stored at 10°C lasts 3–4 months at peak quality. For snacks eaten regularly, pantry storage is fine; for longer-term cooking vegetable storage, a cool cellar or refrigerator is preferable.
 Xinqian Village (Dehydrated Fruit and Vegetable Industrial Park), Duotian Street, Xinghua City, Taizhou City, Jiangsu Province, China
 +86-13852647168
