 English
 中文简体
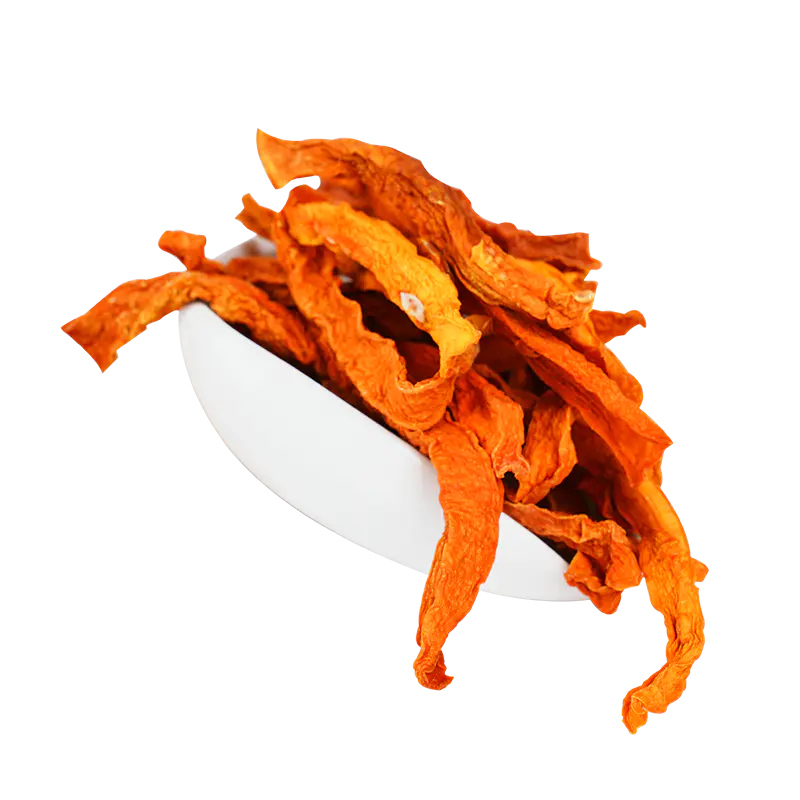
中文简体Dried pumpkin is a nutritious, shelf-stable ingredient that can be used in soups, stews, baked goods, snacks, and even ground into powder for smoothies or sauces. Making dried pumpkin at home is not only cost-effective but also a great way to preserve this seasonal vegetable for year-round use. Whether you use an oven, dehydrator, or sunlight, the process is simple and rewarding. In this article, we’ll walk you through everything you need to know to dehydrate pumpkin at home—from selecting the right pumpkin to proper storage techniques.
Content
Why Dry Pumpkin?
Pumpkin is rich in beta-carotene, fiber, potassium, and vitamins A and C. However, fresh pumpkin is highly perishable and can only be stored for a limited time. Drying removes most of the water content, significantly extending shelf life while preserving flavor and nutrients. Homemade dried pumpkin can be rehydrated easily and used in various recipes or ground into powder for convenient use.
Step-by-Step Guide to Making Dried Pumpkin
Step 1: Choose the Right Pumpkin
For drying purposes, it's best to use sugar pumpkins (also called pie pumpkins) or other small, dense-flesh varieties. These pumpkins have a lower water content and sweeter flavor than large carving pumpkins.
|
Pumpkin Type |
Suitable for Drying? |
Notes |
|
Sugar Pumpkin |
Yes |
Sweet, dense flesh, ideal for drying |
|
Butternut Squash |
Yes |
Technically a squash, but works well |
|
Jack-o'-Lantern Type |
No |
High water content, stringy texture |
Step 2: Wash and Peel
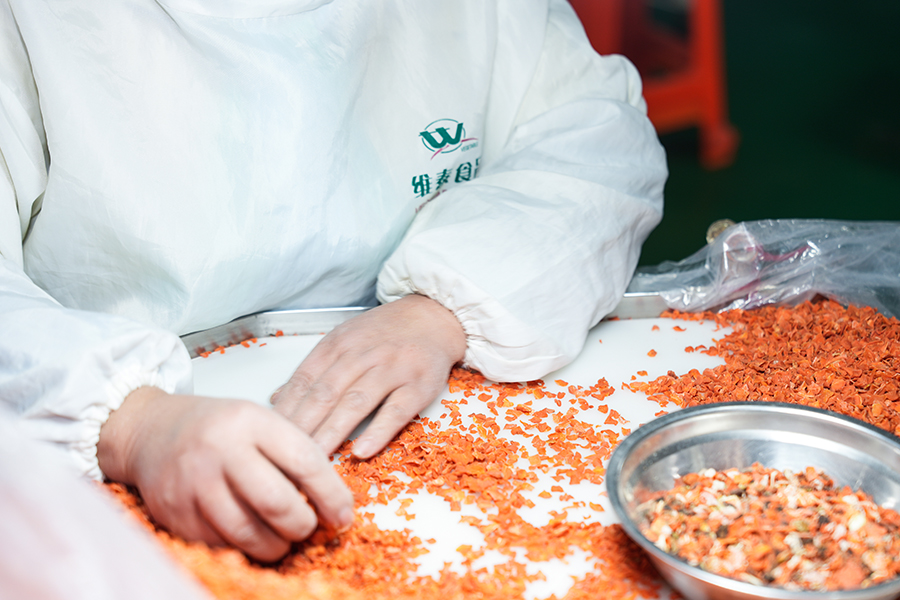
Rinse the pumpkin thoroughly under running water to remove dirt or debris. Use a vegetable peeler or a sharp knife to peel the skin. Then, cut the pumpkin in half and scoop out the seeds and stringy pulp with a spoon. Save the seeds if you want to roast them later.
Step 3: Cut Into Thin, Even Pieces
Cut the pumpkin flesh into thin slices or small cubes about 1/8 to 1/4 inch thick. Uniform thickness ensures even drying. Thinner pieces dry faster and more evenly, reducing the risk of spoilage.
|
Cut Type |
Drying Time (approx.) |
Best For |
|
Thin Slices (1/8 inch) |
6–12 hours |
Chips, snacks |
|
Small Cubes (1/4 inch) |
8–14 hours |
Soups, stews, powders |
Step 4: Optional – Blanching
Blanching is optional but recommended, especially if you want better color and texture retention. It also helps destroy enzymes that could affect flavor and nutrition during storage.
To blanch:
1.Bring a pot of water to boil.
2.Place pumpkin pieces in a wire basket and submerge for 2–3 minutes.
3.Immediately transfer to an ice water bath to stop cooking.
4.Drain and pat dry with a clean towel.
Step 5: Arrange on Drying Trays
Place pumpkin pieces in a single layer on dehydrator trays, baking sheets (for oven drying), or mesh screens (for sun drying). Make sure the pieces are not overlapping to ensure even airflow and drying.
Drying Methods
1. Using a Dehydrator (Recommended)
Set your dehydrator to 125–135°F (52–57°C). Drying time varies between 6 and 14 hours depending on slice thickness and humidity levels. Rotate trays every few hours for even drying.
2. Using an Oven
Preheat your oven to the lowest possible temperature (usually around 140–170°F / 60–75°C). Place the trays in the oven and crack the oven door slightly to allow moisture to escape. Drying may take 10–16 hours. Flip the pieces occasionally.
3. Sun Drying
Only possible in very dry, hot climates. Place pumpkin pieces on screens covered with cheesecloth in direct sunlight for several days. Bring indoors at night to avoid moisture from dew. Sun drying is less reliable and not recommended in humid areas.
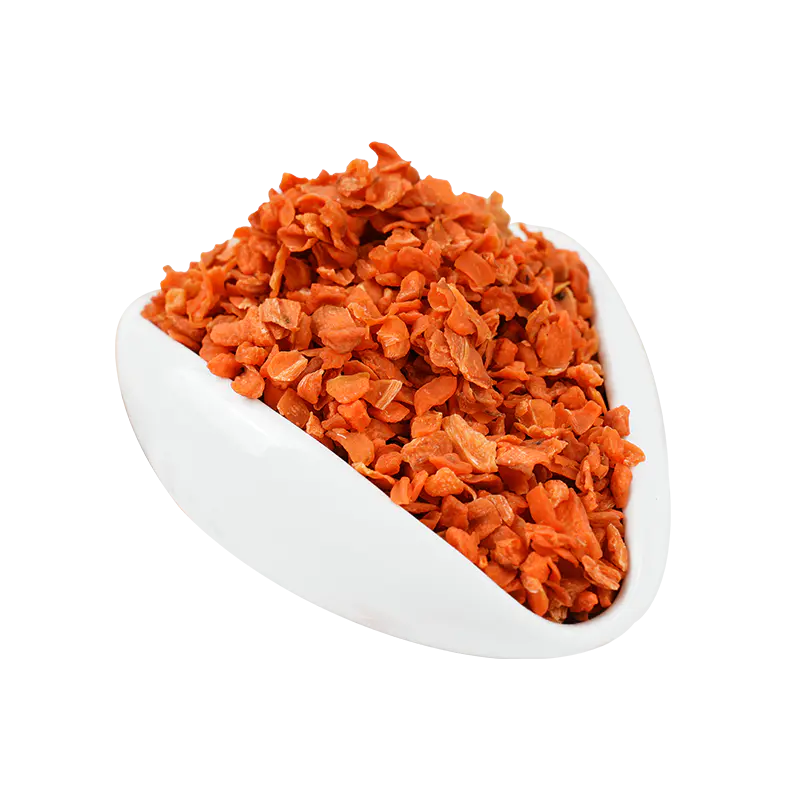
How to Know When It's Done
Properly dried pumpkin should be:
Leathery or slightly brittle
Not sticky or soft
Completely dry all the way through
To test, cool a few pieces and break them. They should not bend or feel moist inside.
How to Store Dried Pumpkin
To keep your dried pumpkin fresh and safe for long-term use, follow these storage tips:
|
Storage Method |
Duration |
Notes |
|
Airtight Container |
6–12 months |
Keep in cool, dark pantry |
|
Vacuum Sealed Bags |
1–2 years |
Excellent for long-term storage |
|
Freezer Storage |
1–2 years |
Preserves flavor and texture well |
|
Add Oxygen Absorbers |
Recommended |
Helps extend shelf life |
Label each container with the date of drying to keep track of freshness.
How to Use Dried Pumpkin
Dried pumpkin is incredibly versatile. Depending on your recipe, you can either rehydrate it first or use it as is.
To Rehydrate:
Soak dried pumpkin slices or cubes in warm water for 15–30 minutes or simmer in broth or soup until soft.
Ways to Use Dried Pumpkin:
|
Use Case |
How to Use |
|
Soups and Stews |
Add dried cubes directly while cooking |
|
Baking (Muffins, Bread) |
Rehydrate and mash or use pumpkin powder |
|
Smoothies |
Use powdered form for rich flavor and nutrition |
|
Pumpkin Chips |
Eat dried slices as a crunchy snack |
|
Baby Food |
Rehydrate and puree for a healthy option |
|
Curry and Stir-Fry Bases |
Add for sweetness and body |
Bonus: How to Make Pumpkin Powder
Once the pumpkin is dried completely, you can grind it into powder using a high-speed blender, spice grinder, or food processor.
Uses of Pumpkin Powder:
Add to smoothies, oatmeal, or yogurt
Use in baking (1 tbsp powder + 2 tbsp water = 1/4 cup pumpkin puree)
Sprinkle on popcorn, granola, or roasted nuts
Incorporate into sauces or spice blends
Store the powder in a tightly sealed container in a cool, dark place. You can also refrigerate or freeze it for extended freshness.
Conclusion
Drying pumpkin at home is a simple and rewarding DIY project that allows you to enjoy this nutrient-rich vegetable throughout the year. Whether you're preparing for off-season use, building a food storage pantry, or just looking for healthy homemade snacks, dried pumpkin is a smart and sustainable choice. With a little time and effort, you can turn fresh pumpkin into a long-lasting kitchen staple that’s ready whenever you are.
 Xinqian Village (Dehydrated Fruit and Vegetable Industrial Park), Duotian Street, Xinghua City, Taizhou City, Jiangsu Province, China
 +86-13852647168
